Plaid Nails Inspiration
There is something inherently nostalgic yet fiercely modern about a well-executed plaid print. I vividly remember styling a fall editorial in London where we juxtaposed classic heritage tartans with sleek, futuristic leather, and it cemented a lesson I hold dear: plaid is a neutral. Whether you are channeling the punk rock spirit of Vivienne Westwood or the uptown polish of a Burberry trench, this pattern translates beautifully to manicures.
However, translating a complex textile weave onto a small, curved nail plate requires precision and a keen eye for color theory. It is not just about drawing intersecting lines; it is about capturing the weight, texture, and depth of fabric. As a fashion stylist, I treat nail art as the ultimate accessory, one that needs to harmonize with your wardrobe rather than compete with it.
In this guide, I will walk you through the high-end approach to plaid nails, from color selection to the tools you need for crisp lines. If you are looking for specific visual examples to take to your technician, you can find our curated Picture Gallery at the end of this blog post.
The Architecture of Plaid: Tools and Technique
Before we discuss aesthetics, we must address the mechanics of creating a clean plaid design. The difference between a messy DIY job and a salon-quality look lies entirely in the tools you use. You simply cannot achieve the necessary precision with the standard brush that comes in a polish bottle.
Designer’s Note: The Golden Rule of Scale
When styling a photoshoot, we often adjust prints based on the model’s proportions; the same logic applies to nails. If you have shorter nail beds, opt for a “windowpane” or open grid plaid. Dense, complex tartans can make short nails look smaller and cluttered.
To execute this look, you need a long, thin liner brush (often called a striper brush). This tool allows you to pull the polish across the nail in one fluid motion rather than sketching it out. This fluidity is what creates that crisp, “printed” appearance.
Common Mistakes + Fixes
- Mistake: Using lines that are all the same thickness.
- Fix: Mimic real fabric weaves. You need a mix of wide “base” stripes and whisper-thin accent lines to create depth.
- Mistake: Smudging the intersection points.
- Fix: Flash cure (if using gel) or wait at least 5 minutes (if using lacquer) between drawing vertical and horizontal lines.
The “Old Money” Aesthetic: Camel and Tartan
The “Old Money” or “Quiet Luxury” trend relies heavily on a specific palette of camel, beige, black, and oxblood. This is the most requested plaid style in high-end salons because it mimics the lining of iconic luxury trench coats. It screams expensive without being flashy.
For this look, the base color is critical. You want a creamy, opaque beige that complements your skin’s undertone. If you have cool undertones, look for a “greige” (gray-beige) base; if you have warm undertones, opt for a sandy or honey-colored tan.
What I’d Do in a Real Project:
1. Start with two coats of the beige base.
2. Paint a thick vertical stripe of black on one side of the nail.
3. Paint a thick horizontal stripe of white near the tip.
4. Use a fine liner brush to add a thin red line crossing the intersection.
5. Finish with a high-gloss top coat to mimic the sheen of silk.
This style looks best on a “Squoval” (soft square) or Almond nail shape. These shapes provide enough surface area for the pattern to breathe while maintaining a classic, feminine silhouette.
Grunge and Punk Influences: The 90s Revival
Fashion is cyclical, and the 90s grunge resurgence is still dominating runways and street style. This interpretation of plaid is darker, moodier, and edgier. Think flannel shirts tied around the waist, combat boots, and forest green palettes.
To achieve this “cool girl” vibe, ditch the beige base. Instead, use a deep navy, hunter green, or even a sheer black tint. The goal here is low contrast and high texture.
Pro-Level Styling Rule: The Matte Finish
Whenever I style a grunge-inspired shoot, I almost always request a matte top coat for the nails. Plaid is traditionally a wool or cotton fabric, which absorbs light rather than reflecting it. A matte finish makes the nail art look more like actual flannel material.
Suggested Color Pairings:
- The Kurt: Forest green base, navy thick stripes, mustard yellow thin accent lines.
- The Vivienne: Royal blue base, red thick stripes, white accent grid.
- The Goth: Black base, charcoal grey thick stripes, silver metallic accent lines.
Textural Play: Creating Tweed and Wool Effects
In the world of couture, texture is everything. Chanel’s bouclé tweed is a variation of a plaid weave that relies on knobby, multi-colored threads. You can replicate this sophisticated texture on your nails using a technique called “sugaring” or by layering translucent polishes.
The secret to a tweed look is imperfection. Unlike the crisp architectural lines of a tartan, tweed lines should be slightly feathered or broken. This creates the illusion of woven yarn.
Step-by-Step for Tweed Texture:
- Apply a solid base color (pastel pink or baby blue works beautifully here).
- Take a dry detail brush and drag a darker shade horizontally and vertically.
- Do not reload the brush often; you want the streaks to look scratchy.
- Add a few dots of metallic gold or silver polish at the intersections to mimic buttons or metallic threading.
- Seal with a top coat to smooth out the surface ridges.
This look is particularly forgiving for DIY enthusiasts. Since the lines are meant to look like rough thread, a shaky hand actually helps create a more realistic texture.
Modern Minimalism: The Grid and Windowpane
Not every client wants a complex, multi-colored pattern on their nails. For the minimalist woman who wears The Row or Jil Sander, the “Windowpane” plaid is the superior choice. This design features a solid background with a single, thin grid pattern overlay.
This style utilizes negative space effectively. A popular variation involves a completely clear or “your nails but better” sheer pink base, with a stark black or white grid painted on top. It is architectural, clean, and incredibly chic.
The Spacing Rule
The success of a windowpane manicure depends on the spacing of the grid. If the squares are too small, it looks like graph paper from math class. If they are too big, you lose the effect of the pattern.
Designer’s Checklist for Windowpane Nails:
- Line Weight: The lines must be razor-thin. Use a “long” liner brush to get a consistent width.
- Symmetry: The center vertical line should be perfectly centered on the nail bed.
- Consistency: Ensure the horizontal lines are at the same height across all five fingers.
Seasonal Transitions: From Gingham to Holiday
One of the reasons plaid remains a fashion staple is its versatility across seasons. By simply swapping the color palette and the density of the weave, you can take this trend from a summer picnic to a Christmas party.
Spring/Summer: The Gingham Check
Gingham is the lighter, breezier cousin of plaid. It typically involves white and one other color (often blue, red, or yellow). The key to realistic gingham is transparency. The areas where the colored stripes intersect should be darker than the single stripes, creating a “checkered” opacity.
Fall: The Earthy Flannel
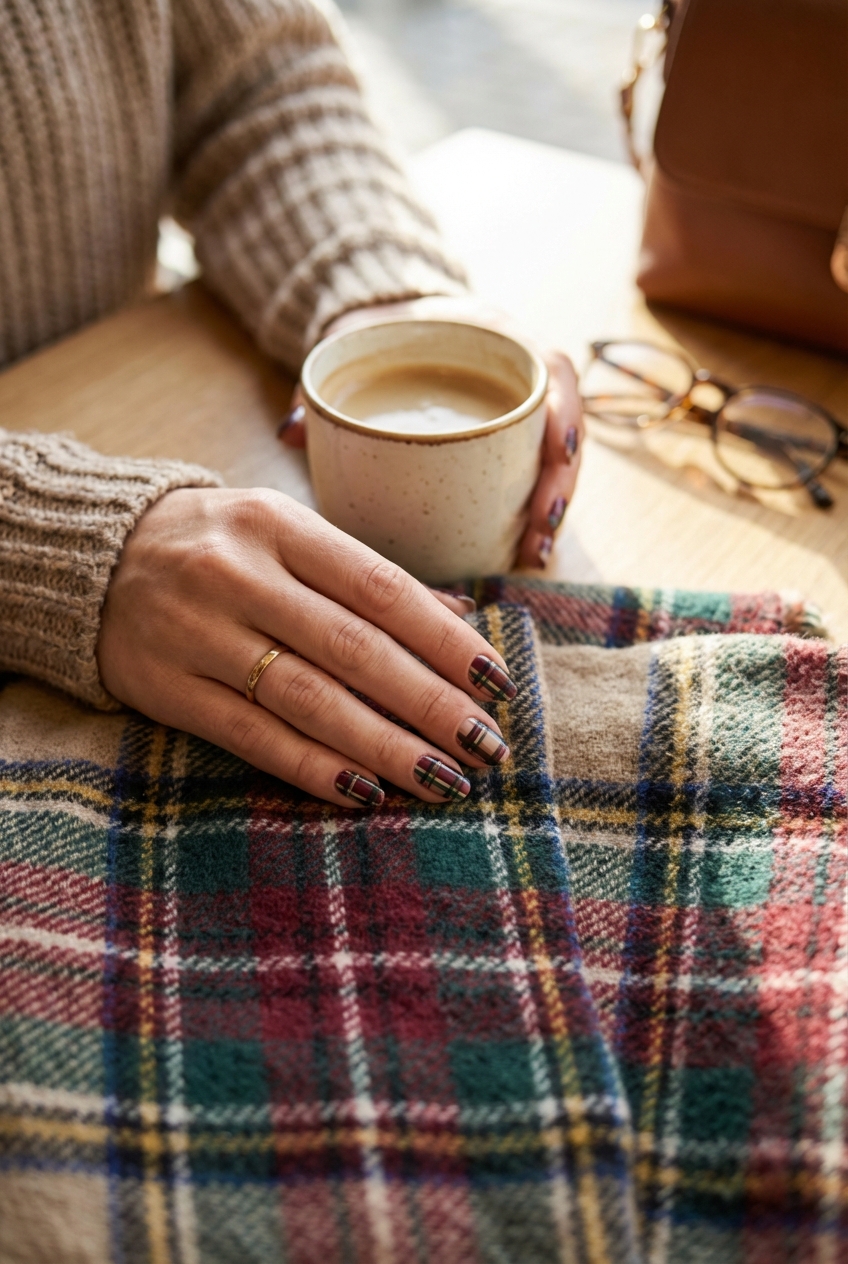
As we move into autumn, we look to nature for color inspiration. Burnt orange, mustard yellow, olive green, and chocolate brown are the pillars of fall plaid. I often recommend doing a “skittle” manicure here, where each nail features a different plaid variation within the same warm color family.
Winter: The Royal Tartan
Holiday nails can easily veer into “tacky” territory. To keep it elegant, stick to Royal Stewart Tartan (red base) or Black Watch Tartan (blue/green base). Use a deep, rich red rather than a bright cherry red. Add a very thin line of gold glitter polish as one of your accents to make it festive without looking like wrapping paper.
Finish & Styling Checklist
As a stylist, I look at the total image. Your nails are part of your outfit. Here is how to ensure your plaid nails elevate your look rather than clutter it.
The “Rule of One Print”
If you are wearing a bold plaid suit or a heavy tartan scarf, skip the plaid nails. It is too matchy-matchy. Pair plaid nails with solids—leather, denim, cashmere, or silk. Let the nails be the focal point of the texture.
Jewelry Coordination
Plaid nails are busy. Keep your rings simple. A classic gold band or a single solitaire looks elegant. Avoid chunky, multi-colored costume rings that fight for attention with the pattern on your nails.
Gloss vs. Matte
Use the finish to dictate the vibe. Gloss feels dressier and more “city.” Matte feels cozier, more casual, and more “weekend in the country.”
FAQs
Can I do plaid nail art with regular polish, or do I need gel?
You can use regular polish, but gel makes it much easier. Gel allows you to cure each layer of lines separately. With regular polish, you risk dragging the wet base lines when you cross them. If using regular polish, wait a full 10-15 minutes between layers.
How long do plaid nails take at a salon?
This is considered intricate nail art. Expect to be in the chair for at least 90 minutes to two hours, especially if you are getting plaid on every finger. Many clients opt for plaid accent nails (usually the ring and index fingers) to save time and money.
What is the best nail shape for plaid designs?
Square or Squoval (square oval) is technically the best because the straight edges of the nail parallel the straight lines of the plaid, creating a satisfying symmetry. However, almond shapes can look very elegant if the pattern is centered correctly.
My lines are always shaky. How do I fix this?
Anchor your pinky finger. When painting, rest your painting hand’s pinky on a stable surface (or your other hand) to stabilize your movement. Also, move the finger being painted, not just the brush.
Conclusion
Plaid nails are a testament to the enduring power of classic patterns in fashion. They allow you to bring the texture of wool, the heritage of tartan, and the structure of architectural grids to your fingertips. Whether you prefer the minimalist route of a windowpane check or the rich complexity of a Burberry-inspired weave, this style commands attention.
Remember that the difference between a good manicure and a great one is patience and color selection. Treat your nails like a canvas, respect the drying times, and don’t be afraid to experiment with matte finishes for that authentic textile feel. It is a sophisticated way to add a print to your look without changing your outfit.
Picture Gallery


