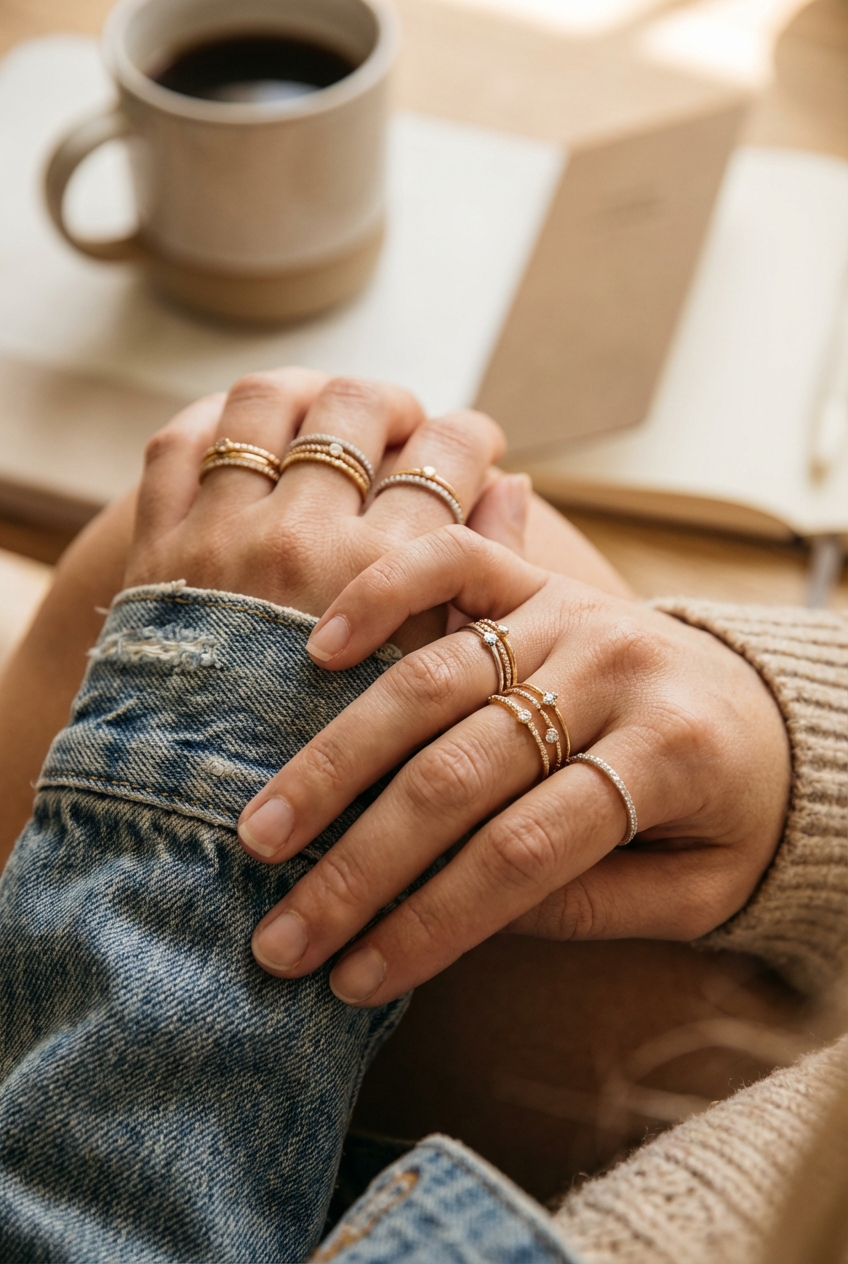
Stackable Rings Adding Subtle Glamour To Your Hands
There is something incredibly intimate about the jewelry we wear on our hands. Unlike earrings or necklaces, which are mostly for others to admire, your rings are constantly in your line of sight. They type with you, drive with you, and gesture with you. Over my years in the fashion industry, I have come to view ring stacking not just as a trend, but as a form of daily self-expression that evolves with your mood and outfit.
I remember helping a client who felt her jewelry collection was too “evening heavy.” She had beautiful cocktail rings that sat in a safe because they felt too ostentatious for a Tuesday morning staff meeting. We broke down the styling barriers by introducing ultra-thin, hammered gold bands to sit alongside her statement pieces. Suddenly, a vintage ruby ring wasn’t “too much”—it was grounded by modern textures. That is the power of a good stack; it democratizes your jewelry box and makes even the fanciest pieces wearable for coffee runs.
Building a curated hand look requires a bit of strategy to avoid looking cluttered or feeling uncomfortable. It is about balancing visual weight, mixing metals intentionally, and respecting the ergonomics of your fingers. To spark your creativity, I have curated a stunning Picture Gallery at the end of the blog post with real-life examples of perfectly stacked sets.
The Foundation: Understanding Band Widths and Proportions
The most common mistake I see beginners make is buying rings that are all the same width. While uniformity has its place, a dynamic stack relies on contrast. If every ring is a standard 3mm band, your finger will look like a solid tube of metal. This can actually make your fingers appear shorter and stouter than they are.
In my styling kit, I categorize rings into three distinct widths. First, you have the “whisper” bands, which are usually 1mm to 1.5mm. These are your spacers. They create breathing room between heavier pieces. Next are the “anchors,” typically 2mm to 4mm. These often hold gemstones or feature intricate carving. Finally, you have the “statements,” which are 5mm or wider.
Designer’s Note: A general rule of thumb for elongation is to expose skin between the rings. Don’t push them completely flush against one another unless they are a bridal set designed to interlock. Leaving a tiny gap—even just a millimeter—between a chunky ring and a midi ring creates negative space. This visual trick lengthens the appearance of the finger significantly.
Mixing Metals: Breaking the Old Rules
Gone are the days when you had to commit strictly to silver or gold. In high-end fashion today, mixing metals is not just allowed; it is a sign of a sophisticated eye. However, doing it well requires a bridge. You cannot simply wear one heavy silver ring and one yellow gold ring and hope they get along. You need a piece that unites them.
I often use a “connector” ring to bridge the gap. This might be a band that consists of twisted two-tone metal, or a rose gold piece that acts as a warm transition between cool silver and rich yellow gold. Rose gold is particularly useful because its copper undertones play well with almost every other alloy.
If you are nervous about mixing, start with a 3:1 ratio. If your wedding set is platinum (cool tone), add three thin silver or white gold bands and one yellow gold band on a different finger. This makes the gold look intentional, like a highlight, rather than a mistake.
Common Mistake + Fix:
Mistake: Mixing finishes that clash, like a highly polished chrome-like silver with a rustic, matte yellow gold.
Fix: Match the finish, not just the metal. If you are going for high-shine polish, keep all rings polished. If you prefer a brushed or hammered aesthetic, ensure your mixed metals share that texture to create cohesion.
Gemstones and Color: The Art of the Focal Point
While plain metal bands are the bread and butter of stacking, gemstones add the personality. In a professional styling session, I usually select one “hero” finger. This is usually the ring finger or the middle finger, where the largest gemstone will sit. The surrounding fingers should play a supporting role, not compete for attention.
When incorporating color, consider the Mohs scale of mineral hardness. This is a technical constraint that many people overlook until it is too late. Diamonds and sapphires are very hard (10 and 9 on the scale, respectively). Opals, pearls, and emeralds are significantly softer.
What I’d do in a real project:
If I am styling a client for daily wear, I never stack a protruding diamond eternity band directly next to a soft opal ring. The diamonds acts like a saw blade against the softer stone every time the hand moves. Always place a smooth, high-polished metal “buffer band” between a textured gemstone ring and a softer stone. This protects your investments from scratching each other.
Sizing Logistics: The Physics of Stacking
This is the most technical part of ring stacking and the one where online ordering often goes wrong. The more rings you add to a single finger, the tighter they will feel. This is because the flesh of your finger naturally tapers; when you cover more surface area with a wide stack, you are pushing that flesh upward, creating a “muffin top” effect above the rings.
If you plan to wear a stack that exceeds 6mm in total width, you must size up. For a stack of three distinct bands, I typically recommend going up a half size. If you are going for a dramatic, knuckle-to-knuckle look, you might need to go up a full size.
You also need to account for fluctuation. Our fingers swell in the heat, after eating salty foods, or after a workout. A stack that feels secure in the morning might feel like a tourniquet by 5:00 PM.
Designer’s Note:
Always fit your rings to your dominant hand. If you are right-handed, your fingers are likely about a half-size larger on that hand due to increased muscle mass. If you buy rings that fit your non-dominant hand perfectly, they likely won’t fit your dominant hand at all. Sizing for the larger hand gives you more versatility to switch rings back and forth.
Texture Play: Adding Dimension Without Bulk
If you want a luxurious look without heavy gemstones, texture is your best friend. A stack of three smooth, plain bands can look a bit utilitarian. But if you swap the middle band for a rope twist, a beaded edge, or a hammered finish, the light catches the metal in different ways.
This serves a functional purpose as well. Highly polished rings show scratches instantly. Textured rings—like those with a Florentine finish or a diamond-cut pattern—are incredibly forgiving. They hide the wear and tear of daily life much better than mirror-finish surfaces.
For a client with an active lifestyle—perhaps a young mother or someone who works with their hands—I almost exclusively recommend textured stacks. They maintain their “glamour” much longer because the inevitable dings blend right into the design.
Common Mistake + Fix:
Mistake: Stacking rings with prongs that catch on everything (sweaters, hair, other rings).
Fix: For everyday stacks, choose bezel-set stones (where the metal surrounds the gem like a rim) or flush-set stones. If you must wear prongs, ensure they are low-profile. High-set cathedral settings are difficult to stack because they don’t allow neighbors to sit flush.
The Midi Ring: Utilizing the Vertical Space
The midi ring—a ring worn above the lower knuckle—is what takes a stack from “traditional” to “fashion-forward.” However, fitting these can be tricky. They need to be tight enough to stay on during hand gestures but loose enough to slide over the fleshy part of the upper finger.
For sizing a midi ring, you generally want to go 3 to 4 sizes smaller than your normal ring size for that finger. So, if you wear a size 7 on your middle finger, a size 3 or 3.5 usually works for the midi position.
Placement is key here. The midi ring should sit comfortably in the dip between your first and second knuckle. If it sits too high, it restricts bending. If it sits too low, it creates an awkward visual tangent with the knuckle.
What I’d do in a real project:
I never put a midi ring on every finger. It looks too costumey. I prefer the “triangle method.” If I have a heavy stack on the ring finger, I place a delicate midi ring on the index finger. This creates a diagonal visual line that draws the eye across the hand, rather than focusing it all in one clump.
Finish & Styling Checklist
Before you head out the door, run through this quick mental checklist to ensure your stack is secure, stylish, and safe for your jewelry.
The Shake Test: Shake your hands vigorously over a soft surface (like a bed). If anything flies off, it is too loose for a stack. Stacking pushes rings up the finger, making them more prone to slipping.
The Bend Test: Can you make a tight fist? If you can’t close your hand completely, remove one band. You need full range of motion.
The Scratch Check: Are any diamonds rubbing against pearls, opals, or turquoise? Insert a gold spacer if they are.
Visual Balance: Do you have rings on every single finger? Try removing one finger’s rings completely to create negative space.
Metal Cohesion: If mixing metals, is there at least one piece that ties the colors together?
Fabric Snag: Run your hand lightly over your clothes. If a prong catches, rotate that ring or move it to a finger where it is less exposed.
FAQs
Can I wear stackable rings on my thumb?
Absolutely. The thumb is an excellent place for a “statement stack.” Because the thumb is isolated from the other fingers, you can go wider here without it rubbing against other rings. I recommend flat bands (like cigar bands) for thumbs rather than stones, as thumb rings take a lot of abuse during daily tasks like gripping a phone or steering wheel.
How do I clean a heavy stack of rings?
Gunk and lotion build up quickly between stacked rings. Once a week, soak them in warm water with a drop of mild dish soap. Use a soft baby toothbrush to gently scrub the sides of the bands where they touch each other. This is crucial because trapped dirt can actually act as an abrasive, wearing down the metal over time.
Is it okay to mix real gold with gold-plated or vermeil jewelry?
Yes, but proceed with caution regarding wear. Solid 14k or 18k gold is durable. Vermeil (gold over silver) or plated jewelry will eventually wear down to the base metal. If you stack a hard 14k ring next to a gold-plated ring, the harder gold will rub the plating off the cheaper ring very quickly. Try to stack “like with like” in terms of quality, or use thin spacers to minimize friction.
What is the best finger to start stacking on?
The ring finger is traditional, but for fashion stacks, I love the middle finger. It is usually your longest finger, providing the most vertical real estate. It can handle a wider stack (3–4 rings) without looking crowded. The index finger is also great for a singular, bold statement piece, but less ideal for stacking due to how much we use it for pointing and gripping.
Conclusion
Curating a ring stack is a journey, not a one-time purchase. It is a collection that grows with you—a thin band from a memorable trip, a gemstone for a milestone birthday, a vintage piece inherited from a grandmother. The beauty of stacking lies in the versatility; you can break them apart for a minimalist office look or pile them high for a dinner party.
Don’t be afraid to experiment with negative space, mixed metals, and varying textures. The only real rule is that your hands should feel functional and the aesthetic should bring you joy. Start with a few high-quality basics, like a thin diamond pavé band and a hammered gold ring, and build your story from there. Your hands are your primary tools for interacting with the world; they deserve to be dressed with intention and glamour.
Picture Gallery


